Quick & Easy: The Fail-Proof Method for Perfect Boiled Sweet Corn
There are few simple pleasures quite as satisfying as biting into a perfectly cooked ear of sweet corn. Juicy, crisp, and bursting with natural sweetness, it’s a taste that instantly evokes summer evenings and backyard barbecues. Yet, for all its rustic charm, achieving that ideal texture can sometimes feel like a culinary tightrope walk. The fear of soggy, mushy, or bland corn on the cob looms large, a gastronomic offense no home cook wants to commit. But what if we told you there’s a method so foolproof, so consistently delicious, that it banishes the risk of poorly cooked corn forever? This comprehensive guide will equip you with the exact steps to master how to
boil corn on the cob, ensuring every bite is nothing short of perfection.
This isn't just about following a recipe; it's about understanding the nuances that elevate a simple ingredient to a star. From selecting the freshest ears to precise timing, we’ll unveil the secrets to unlocking corn’s inherent goodness with minimal effort and maximum flavor. Prepare to make boiled corn on the cob a consistent highlight of your table, much like the unexpected success story of a college student whose accidental perfection became a lifelong culinary staple.
Why Boiling Remains the Ultimate Method for Sweet Corn
While grilling, roasting, or even microwaving have their place, boiling stands out as one of the most traditional, reliable, and arguably the best methods for preparing fresh sweet corn. It’s a technique that champions simplicity, allowing the corn's natural sugars and delicate texture to shine through without competition.
When you
boil corn on the cob, you're embracing a quick and easy approach that delivers consistent results every time. Unlike other methods that might dry out the kernels or introduce smoky flavors, boiling gently steams the corn, preserving its succulence and intensifying its inherent sweetness. There’s no need for elaborate seasonings or added fats in the cooking water when the corn is at its peak; plain water is often all it takes to bring out its best. Many recipes suggest adding milk, sugar, or butter to the pot, but for truly fresh, in-season sweet corn, these additions are largely unnecessary and can even detract from its pure, unadulterated flavor. It's a testament to the ingredient itself – when it's good, simple preparation is king. This low-effort, high-reward approach makes boiled corn on the cob a go-to side dish that pairs effortlessly with almost any summer meal, from grilled meats to fresh salads.
The Golden Rule: Choosing the Freshest Corn
The journey to perfect boiled corn on the cob begins long before the water even hits the pot. The single most critical factor in achieving incredible flavor and texture is starting with the freshest corn you can find. Sweet corn begins to convert its sugars to starch almost immediately after being picked, which means the fresher it is, the sweeter and more tender it will be.
Here’s how to pick the best ears:
*
Source Matters: Prioritize farmer’s markets, roadside stands, or local grocery stores that explicitly highlight seasonal, locally sourced produce. The less time between farm and kitchen, the better.
*
Check the Husks: Look for husks that are vibrant green, tightly wrapped around the ear, and feel slightly damp. Avoid husks that are dry, yellowing, or have visible holes, as these indicate older corn or pest damage.
*
Examine the Silk: The silk should be light brown or gold, slightly sticky, and feel a bit damp. Black, dry, or brittle silk often means the corn is past its prime.
*
Feel the Kernels: Gently press on the kernels through the husk. They should feel plump and firm all the way to the tip. Avoid ears with soft spots or missing kernels, which suggest underdeveloped or damaged corn. If you can, peel back a small section of the husk to peek at the kernels themselves – they should be tightly packed, shiny, and appear plump. A quick pierce with your fingernail should release a milky liquid, a clear sign of fresh sweet corn.
Starting with optimal corn sets the stage for success, ensuring that even a simple boiling method will yield extraordinary results.
The Fail-Proof Method: Step-by-Step to Perfection
Now that you have your pristine ears of corn, it's time to unleash their full potential with our fail-proof boiling method. The key to avoiding mushy corn and achieving that desired crisp-tender bite lies in precise timing and preparation.
Preparation
- Shuck the Corn: Begin by removing the husks and silk from each ear of corn. The easiest way to do this is to grab the top of the husk and silk in one hand and firmly pull downwards towards the base of the ear. Repeat this process until all husks are removed. For stubborn silk strands, a clean kitchen brush or a damp paper towel can help.
- Rinse Gently: Briefly rinse the shucked corn under cool water to remove any remaining silk or debris.
- Choose Your Pot: Select a large pot or Dutch oven that is wide enough to comfortably hold your corn on the cob without overcrowding. You want enough space for the ears to be fully submerged in water.
Boiling the Water
- Fill with Water: Fill your pot with enough plain, cold water to completely cover the corn once it’s added. There’s no need for salt at this stage; some culinary wisdom suggests salt can toughen the corn if added to the boiling water, though the impact is often minimal with fresh sweet corn and short cooking times.
- Bring to a Rolling Boil: Place the pot on high heat and bring the water to a vigorous, rolling boil. This is crucial! Adding corn to cold or simmering water allows it to cook slowly and become mushy. The goal is a quick, high-heat cooking burst.
Cooking the Corn
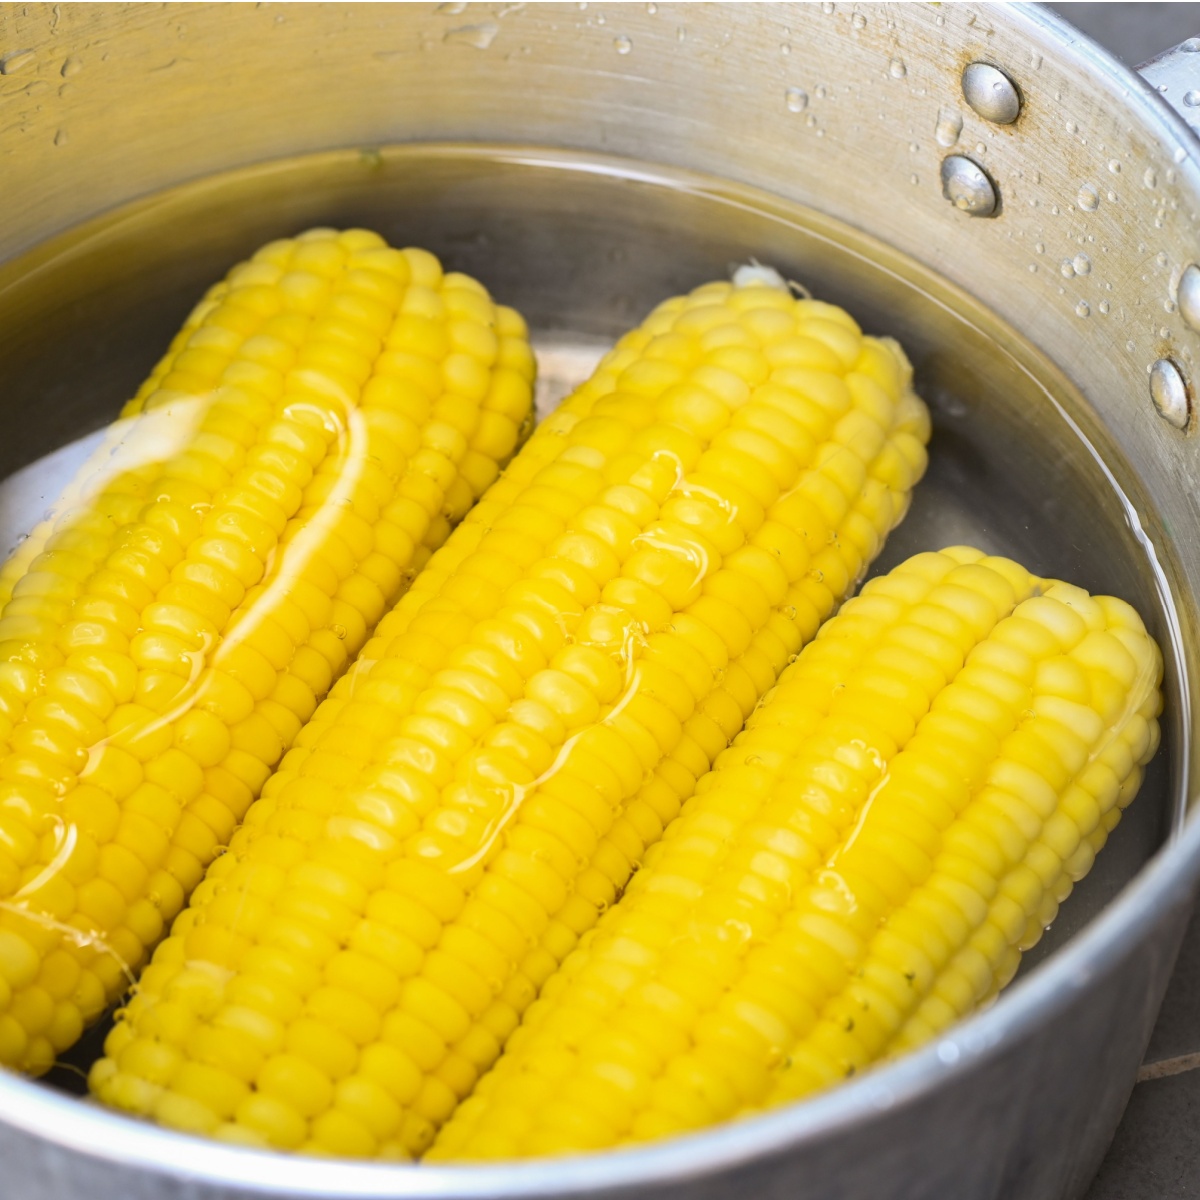
- Add the Corn: Carefully place the shucked ears of corn into the pot of boiling water. Ensure they are fully submerged. The water temperature will drop slightly, but should return to a boil quickly.
- The Critical Cooking Time: Once the water returns to a boil, set your timer for 3 to 5 minutes. For very fresh, tender sweet corn, 3 minutes is often all you need. If your corn is slightly older or larger, you might go up to 5 minutes. Resist the urge to overcook! This short cooking window is the secret to crisp, sweet corn. Overcooking turns the natural sugars to starch and results in a dull, mushy texture. You'll notice the corn will turn a brighter, more vibrant yellow, and the kernels will appear plump.
Draining and Serving
- Remove Promptly: As soon as the timer goes off, carefully remove the corn from the boiling water using tongs. Do not leave it sitting in the hot water, as it will continue to cook.
- Serve Immediately: Transfer the hot corn to a platter and serve right away.
This method, surprisingly simple yet incredibly effective, echoes the accidental success of a novice cook who discovered the magic of brief boiling. It’s a testament to how uncomplicated perfection can be.
Mastering Your Boiled Corn: Tips, Tricks & Variations
While the basic method is straightforward, a few additional insights can elevate your boiled corn on the cob experience even further.
*
The Salt Debate: As mentioned, adding salt to the boiling water is a topic of debate. While it generally doesn't significantly toughen *fresh* sweet corn during short cooking times, it can certainly be added to the water if desired, perhaps a teaspoon per gallon, for subtle seasoning. However, most prefer to season the corn *after* it's cooked.
*
Seasoning Beyond Butter: The classic pairing of butter, salt, and black pepper is timeless for a reason. But don't be afraid to get creative!
*
Mexican Street Corn Style (Esquites-inspired): A squeeze of lime juice, a sprinkle of chili powder or cayenne, and crumbled cotija cheese.
*
Herb Butter: Mix finely chopped fresh herbs like chives, parsley, or cilantro into softened butter.
*
Garlic Butter: Mince a clove of garlic and mix with softened butter.
*
Spicy Kick: A drizzle of sriracha mayo or a dash of hot sauce.
*
Dealing with Less-Than-Fresh Corn: If your corn isn't peak-season fresh, and you find it a bit starchy or less sweet, you *could* consider adding a pinch of sugar (1-2 teaspoons per pot) to the boiling water. Some even add a splash of milk, though for truly fresh corn, these steps are unnecessary.
*
Storage: If you have leftover cooked corn on the cob, let it cool completely, then wrap it tightly in plastic wrap or aluminum foil and refrigerate for up to 3-4 days. For longer storage, consider cutting the kernels off the cob and freezing them in airtight bags.
*
Reheating: Gently reheat cooked corn in the microwave (wrapped in a damp paper towel) or briefly in a pot of simmering water. Avoid re-boiling extensively, as this will lead to mushiness.
Conclusion
Learning how to
boil corn on the cob properly is a fundamental kitchen skill that promises delicious rewards. By prioritizing freshness, understanding the importance of a rolling boil, and adhering to short, precise cooking times, you can consistently achieve that coveted crisp-tender texture and sweet flavor. This fail-proof method ensures that every ear of corn you serve is a testament to the simple perfection of summer's bounty.
So, the next time you're craving that quintessential summer side, reach for the freshest corn you can find, and confidently apply this straightforward technique. You'll discover just how easy it is to
Master Boiling Corn on the Cob: The Foolproof Guide for Perfection, and
Boil Corn the Right Way: Unlock Sweetness Without Mushy Results, turning a simple vegetable into a memorable culinary experience. Enjoy the sweet taste of success!